Importing from QuickBooks Desktop
AllMy Ledger can import your chart of accounts, customers, vendors, and full transaction history from QuickBooks Desktop using standard CSV report exports.
What You'll Need
Before starting, export these reports from QuickBooks Desktop as CSV files:
General Ledger CSV (required)
Contains your chart of accounts with opening balances. In QuickBooks: Reports → Accountant & Taxes → General Ledger. Set dates to "All", then export as CSV.
Journal CSV (required)
Contains all your historical transactions. In QuickBooks: Reports → Accountant & Taxes → Journal. Set dates to "All", then export as CSV.
Account Listing CSV (optional)
Provides accurate account types and parent-child hierarchy. In QuickBooks: Reports → List → Account Listing. Set dates to "All", then export as CSV. Recommended for complex charts of accounts.
Note: AllMy Ledger imports standard CSV reports — not IIF or QBW files.
The Import Wizard
Go to Import → From QuickBooks in the sidebar. The wizard walks you through five steps:
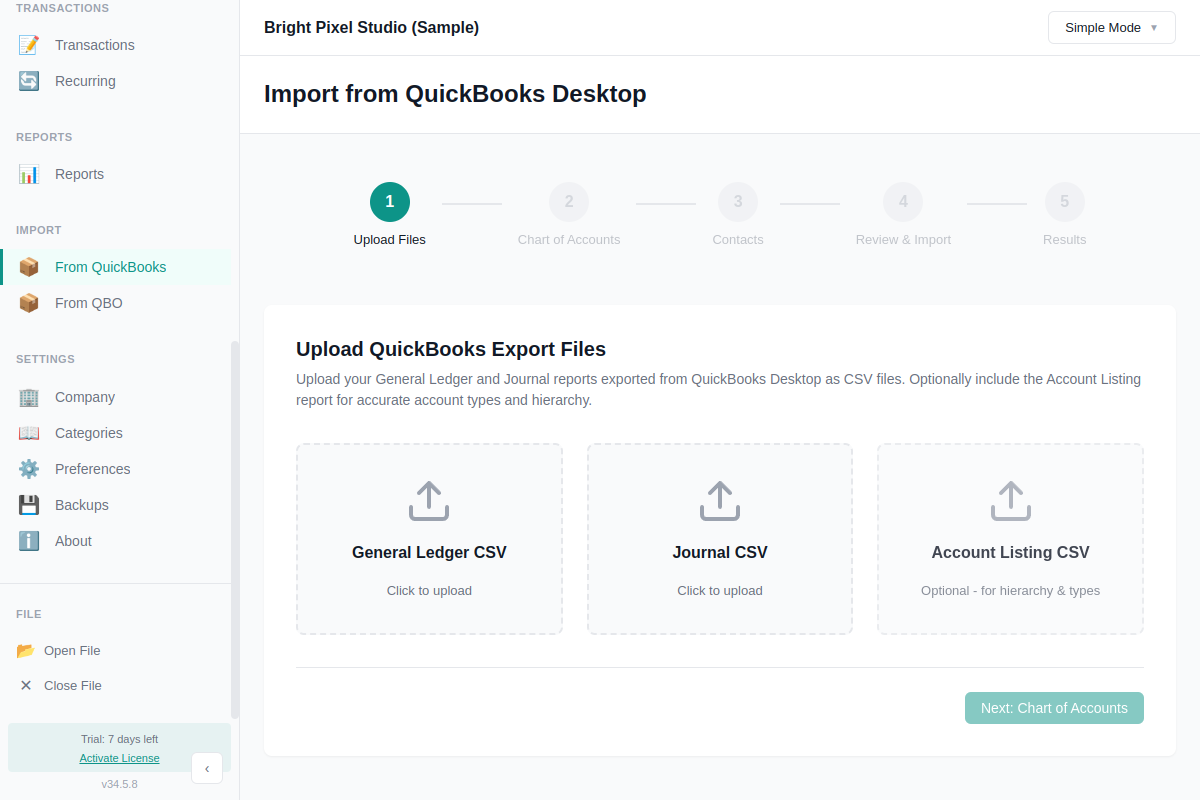
Step 1: Upload Files
Upload your General Ledger and Journal CSV files. Optionally add the Account Listing CSV for better account type detection. Once both required files are uploaded, AllMy Ledger parses them and shows a summary — accounts found, transactions found, and unique contacts detected.
Step 2: Chart of Accounts
Review the accounts detected from your export. For each account you can:
- Include or exclude it from the import
- Edit the account type and subtype (auto-detected but adjustable)
- Change the account number (auto-assigned by type)
- Set parent-child relationships
- Map to an existing account instead of creating a new one
A balance indicator at the bottom confirms your opening balances are in balance (total debits equal total credits). You must fix any imbalance before proceeding.
Step 3: Contacts
AllMy Ledger extracts customer and vendor names from your transactions. For each contact, choose to create it as a customer, vendor, map to an existing contact, or skip it. The wizard auto-detects whether a name is likely a customer or vendor based on the transaction types associated with it.
Step 4: Review & Import
See a summary of what will be imported: accounts to create, contacts to create, opening balance entries, and total transactions. Set the opening balance date (auto-calculated as one day before your first transaction). Click Import QuickBooks Data to start.
The import runs inside a database transaction — if anything goes wrong, all changes are rolled back and your data stays clean.
Step 5: Results
Shows a summary of everything that was imported: accounts created, contacts created, transactions imported, and any that were skipped. If there are warnings or errors, they're listed here with details. From this screen you can view your new Chart of Accounts or start another import.
After Importing
Verify your data by comparing a few key numbers against QuickBooks:
- Run a Balance Sheet and compare totals
- Check that bank account balances match
- Run a Profit & Loss for a recent period and compare
- Review your Chart of Accounts for correct types and hierarchy
What Doesn't Import
- Items, products, and services (no items list in AllMy Ledger)
- Classes and jobs/projects
- Inventory tracking data
- Memorized transactions
- Attached documents and receipts
- Custom fields, price levels, budgets
- Payroll employee records (payroll liabilities import as transactions)
- Sales tax configuration (must set up manually)
Troubleshooting
Opening balances won't balance
The Chart of Accounts step requires debits and credits to balance. Check that you haven't excluded key accounts (like Retained Earnings or equity accounts). If you included the optional Account Listing CSV, the types may be more accurate.
Transactions skipped
Transactions are skipped if they reference an account that wasn't included in the import. Check the Results screen for details on which transactions were skipped and why. You may need to go back and include those accounts.
Wrong account types
AllMy Ledger infers account types from the structure of your General Ledger export. If it gets some wrong, fix them in Step 2 before importing. Including the Account Listing CSV significantly improves type detection.
Need Help?
If you run into issues, contact support with a screenshot of any errors and the approximate number of transactions in your file.