Importing from QuickBooks Online
AllMy Ledger can import your chart of accounts, customers, vendors, and full transaction history from QuickBooks Online using XLSX report exports. The process takes about 10 minutes.
What You'll Need
Export these reports from QuickBooks Online as XLSX files:
General Ledger XLSX (required)
Contains your chart of accounts with balances and transaction history. Used to build your account structure, detect parent-child relationships, and calculate opening balances.
Journal XLSX (required)
Contains all your historical transactions as double-entry journal entries. Customer and vendor names are extracted automatically from transaction data.
Customer List XLSX (optional)
Adds email addresses, phone numbers, and billing/shipping addresses to imported customers. Without this, customers are still created from the Journal but without contact details.
Vendor List XLSX (optional)
Adds email addresses, phone numbers, and addresses to imported vendors. Without this, vendors are still created from the Journal but without contact details.
Note: You do not need the Trial Balance, Balance Sheet, or Profit & Loss reports — the General Ledger already contains all that data.
Exporting from QuickBooks Online
QBO has a bulk export feature that downloads multiple reports at once. You need Company Admin access to use it.
- Click the gear icon in the top-right corner of QuickBooks Online
- Select Export Data
- Set the date range to All Dates (or the range you want to import)
- On the Reports tab, turn on General Ledger and Journal
- On the Lists tab, turn on Customers and Vendors (optional but recommended)
- Click Export to Excel
QBO downloads a ZIP file containing the individual XLSX files. Extract (unzip) the file to a folder on your computer before importing — AllMy Ledger needs the individual .xlsx files, not the ZIP.
Don't see Export Data? This option is only available to Company Admins. If you have a different role, ask your admin to export the data for you — or export reports individually from the Reports screen using "Export to Excel."
The Import Wizard
Go to Import → From QBO in the sidebar. The wizard walks you through five steps:
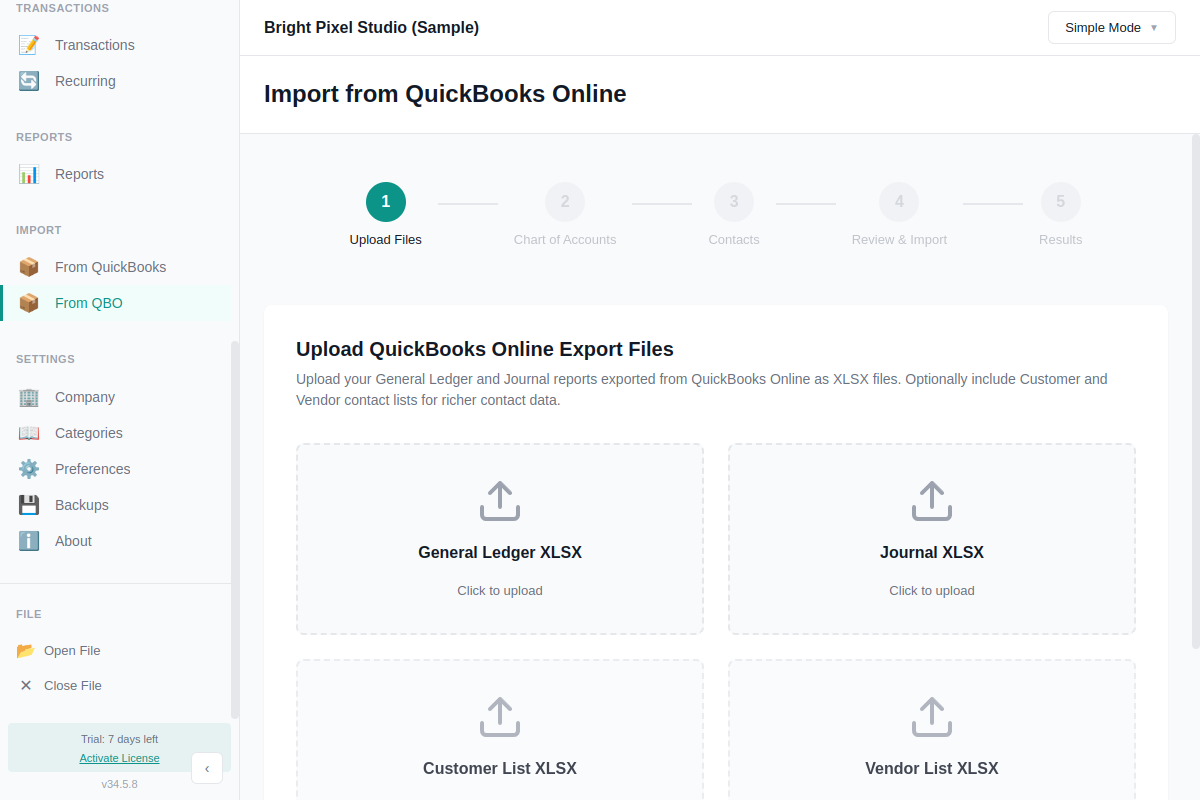
Step 1: Upload Files
Upload your General Ledger and Journal XLSX files. Optionally add the Customer List and Vendor List files for richer contact details. Once both required files are uploaded, AllMy Ledger parses them and shows a summary — accounts found, transactions found, unique contacts detected, and any deleted or empty accounts that were skipped.
Step 2: Chart of Accounts
Review the accounts detected from your General Ledger. For each account you can:
- Include or exclude it from the import
- Edit the account type and subtype (auto-detected but adjustable)
- Change the account number (auto-assigned by type)
- Set parent-child relationships
- Map to an existing account instead of creating a new one
A balance indicator at the bottom confirms your opening balances are in balance (total debits equal total credits). You must fix any imbalance before proceeding.
Step 3: Contacts
AllMy Ledger extracts customer and vendor names from your Journal transactions. If you uploaded the Customer List or Vendor List files, their email, phone, and address details are merged in automatically. For each contact, choose to create it as a customer, vendor, map to an existing contact, or skip it. The wizard auto-detects whether a name is a customer or vendor based on transaction types (invoices and payments suggest a customer; expenses and checks suggest a vendor).
Step 4: Review & Import
See a summary of what will be imported: accounts to create, contacts to create, opening balance entries, and total transactions. Set the opening balance date (auto-calculated as one day before your first transaction). Click Import QuickBooks Online Data to start.
The import runs inside a database transaction — if anything goes wrong, all changes are rolled back and your data stays clean.
Step 5: Results
Shows a summary of everything that was imported: accounts created, contacts created, transactions imported, and any that were skipped. If there are warnings or errors, they're listed here with details. From this screen you can view your new Chart of Accounts or start another import.
After Importing
Verify your data by comparing a few key numbers against QuickBooks Online:
- Run a Balance Sheet and compare totals
- Check that bank account balances match
- Run a Profit & Loss for a recent period and compare
- Review your Chart of Accounts for correct types and hierarchy
What Doesn't Import
- Items, products, and services (no items list in AllMy Ledger)
- Classes, locations, and projects
- Employee records (payroll transactions import as journal entries)
- Recurring transactions and templates
- Attached documents and receipts
- Tax rates and sales tax configuration
- Estimates and purchase orders
- Custom fields and budgets
Troubleshooting
Opening balances won't balance
The Chart of Accounts step requires debits and credits to balance. Check that you haven't excluded key accounts (like Retained Earnings or equity accounts). If balances still don't match, AllMy Ledger will create an Opening Balance Equity account to capture the difference.
Transactions skipped
Transactions are skipped if they reference an account that wasn't included in the import. Check the Results screen for details on which transactions were skipped and why. You may need to go back and include those accounts.
Wrong account types
AllMy Ledger infers account types from the section order in your General Ledger export. If it gets some wrong, fix them in Step 2 before importing.
Contacts missing details
If your imported contacts only have names but no email or phone, you likely didn't include the Customer List and Vendor List files. You can re-import with those files, or add contact details manually after import.
Need Help?
If you run into issues, contact support with a screenshot of any errors and the approximate number of transactions in your file.